
Creating an event
The wizard at eventwave.hr/organizers has five steps: Event Type → Details → Tickets → Media → Publish. The same wizard is also used for editing an existing event.
Your progress is saved: for guests in the browser (7 days, including selected images), for logged-in users during the session. After logging in (e.g. via Google) the wizard returns exactly to where you left off.
Step 1: Event type
Section titled “Step 1: Event type”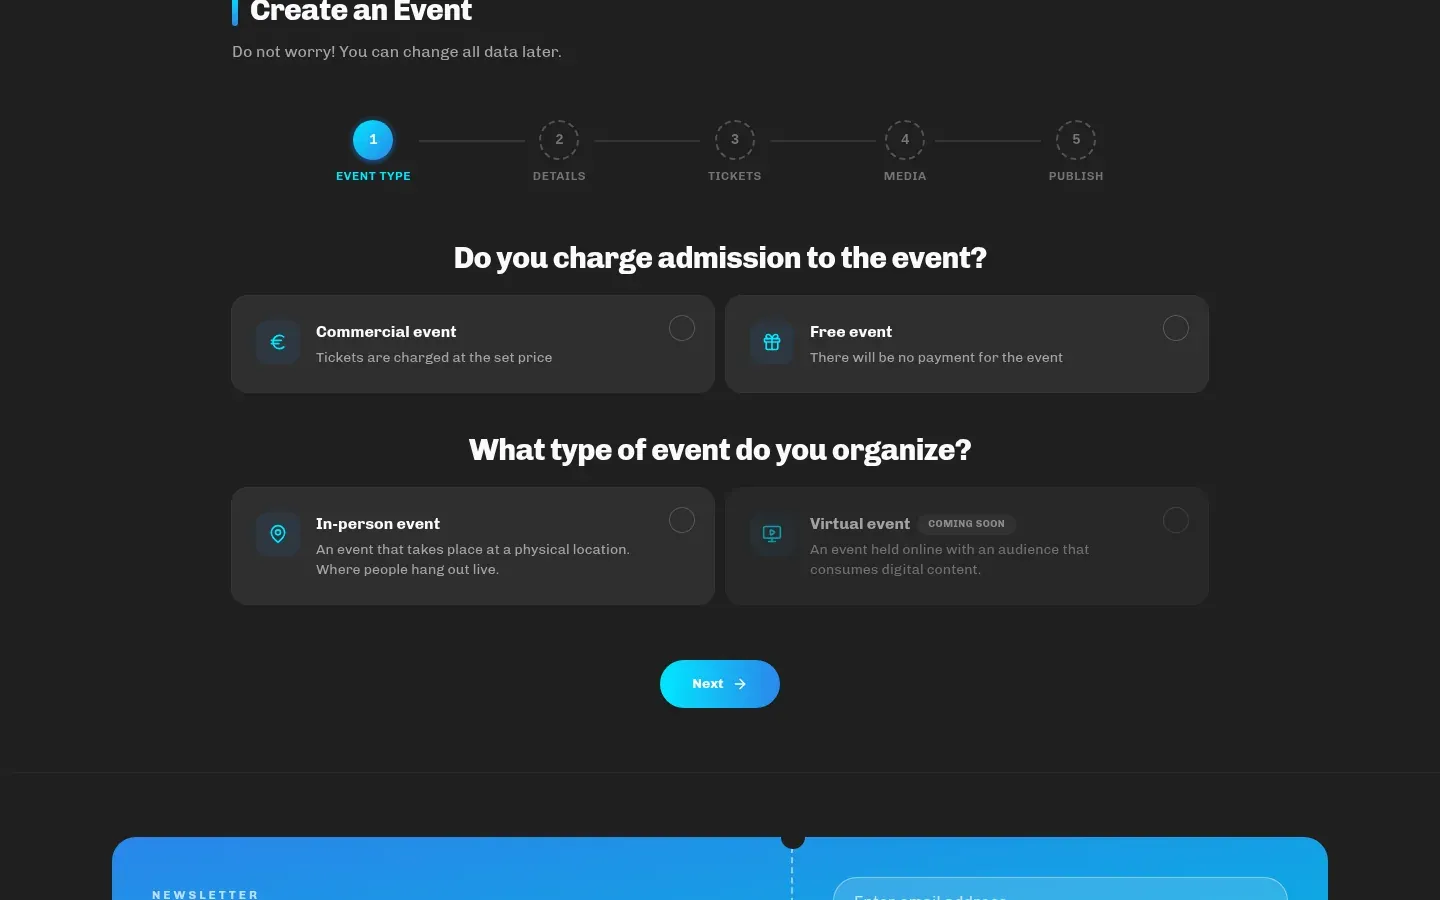
- Do you charge admission to the event? Commercial event (ticket sales) or Free event (no tickets; the tickets step and scanners are skipped).
- What type of event do you organize? In-person event. (Virtual event carries a Coming Soon badge and cannot be selected yet.)
Step 2: Details
Section titled “Step 2: Details”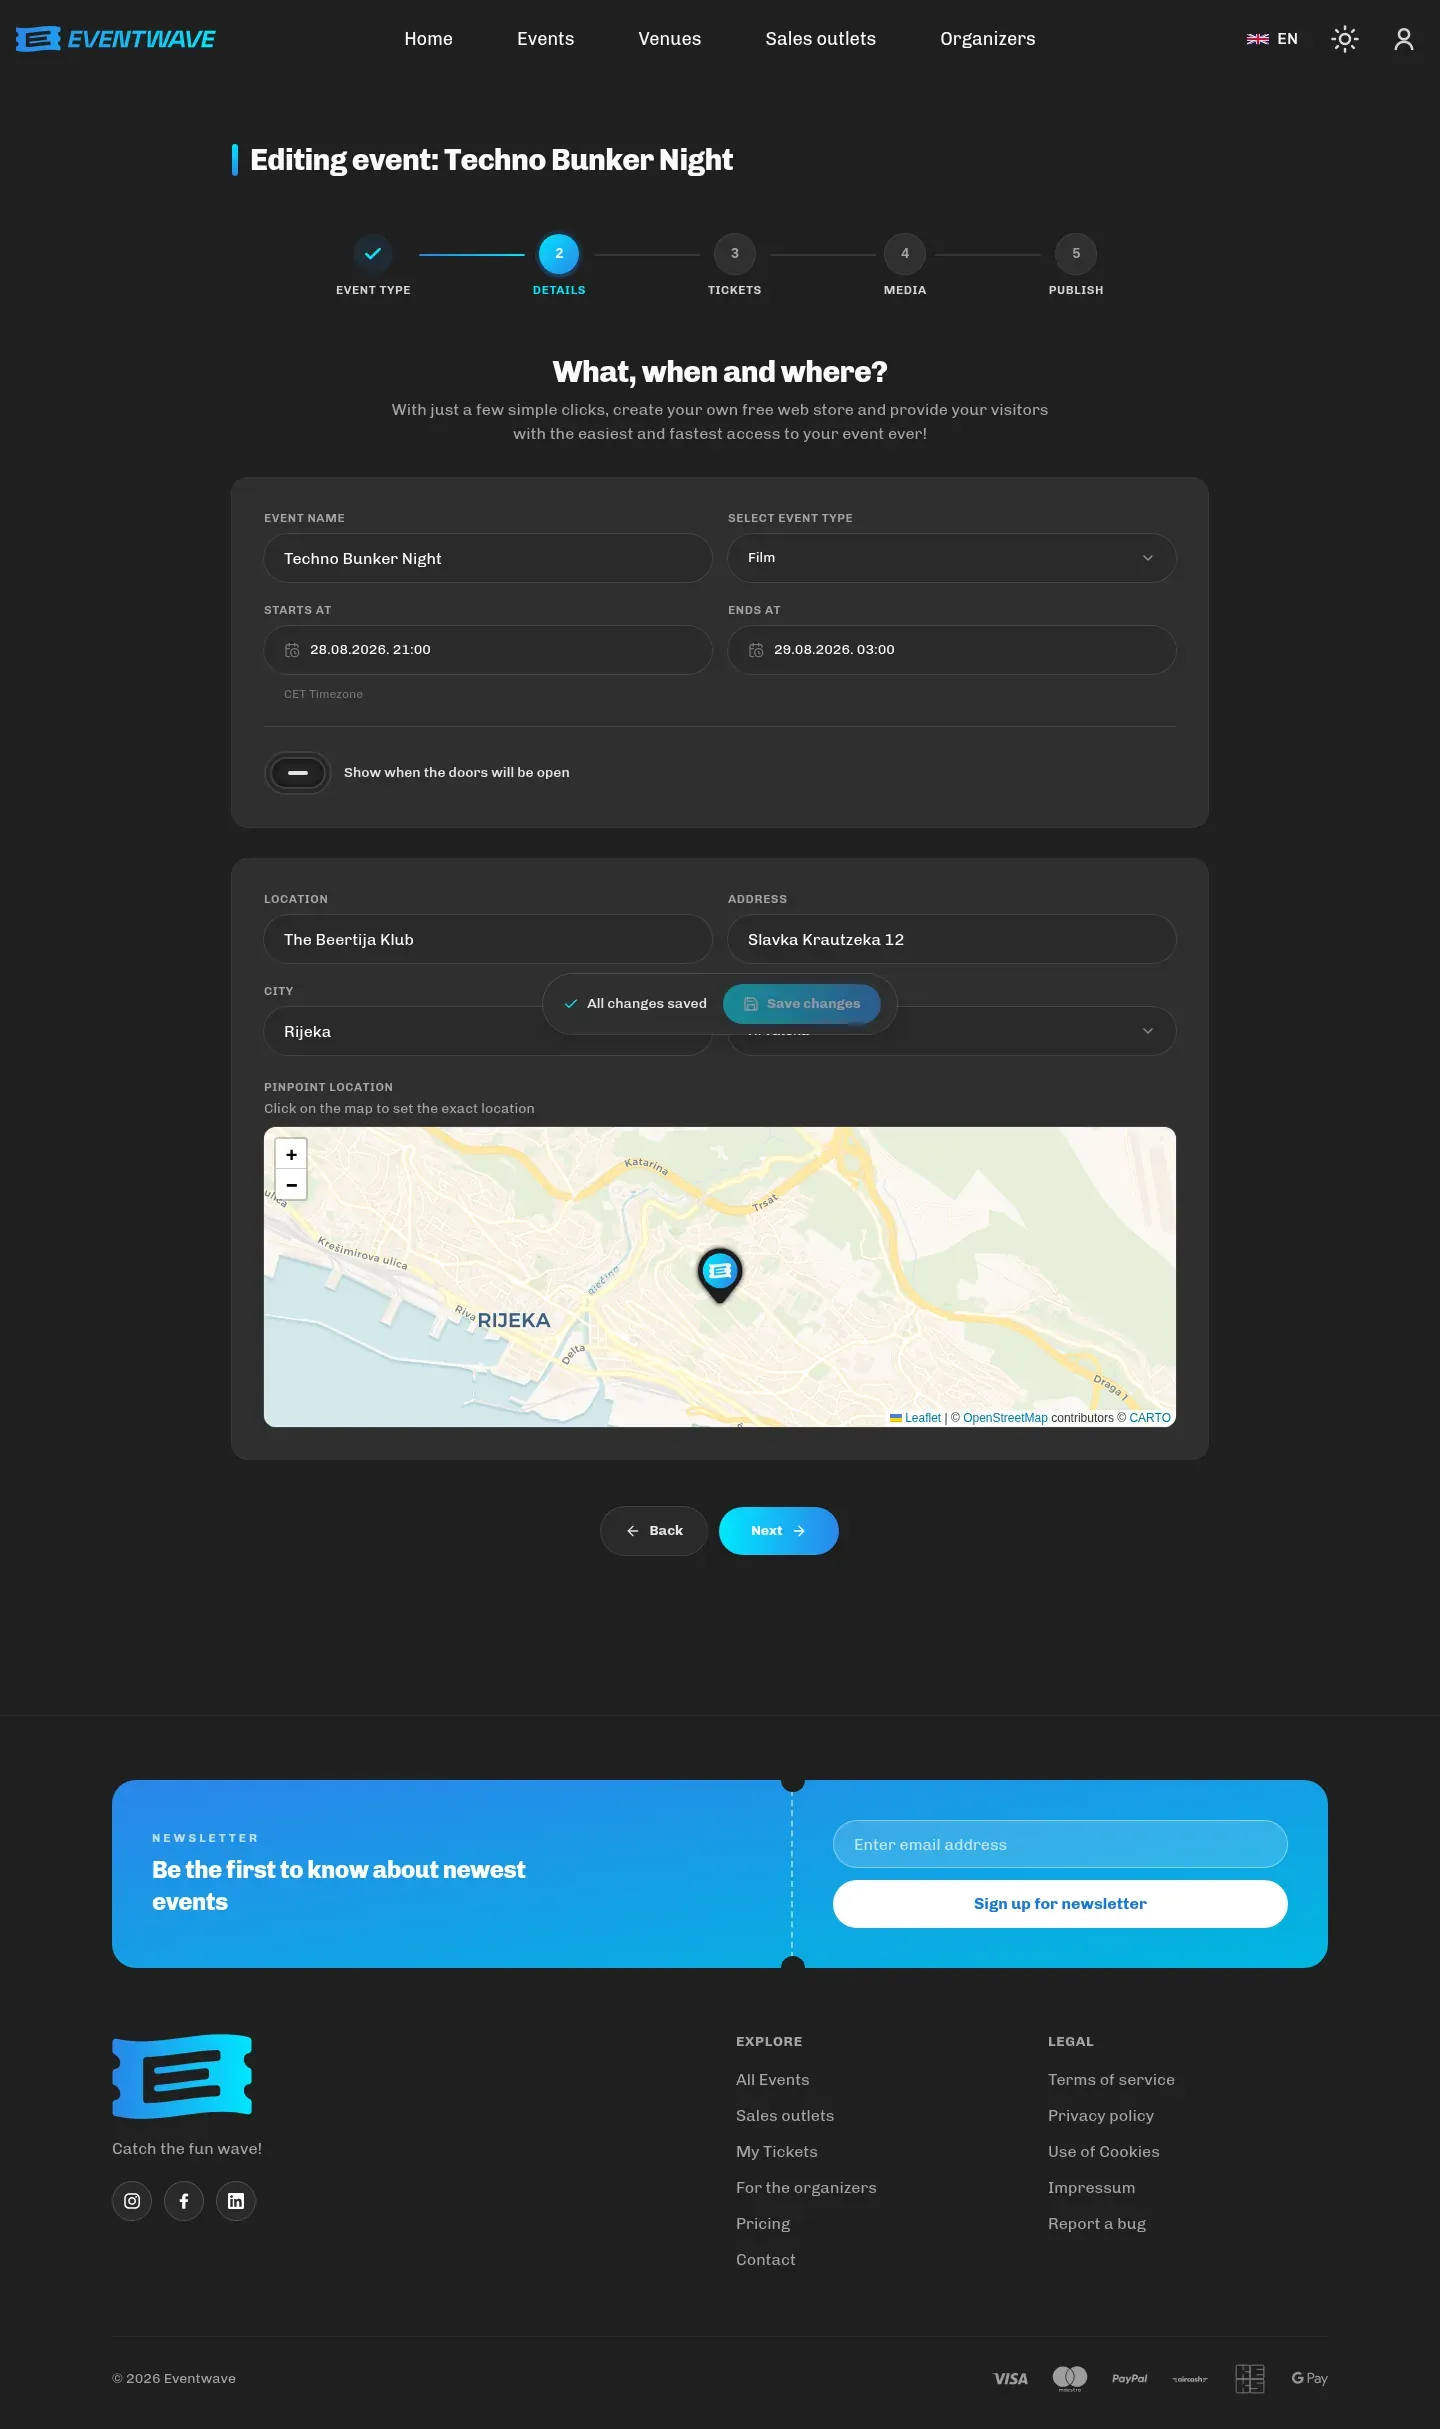
| Field | Notes |
|---|---|
| Event name | Required. It becomes the page address (eventwave.hr/events/event-name-12345). |
| Category | Required; a grouped list (e.g. Music → Concert). |
| Starts at / Ends at | Date + hour + minutes (minutes in steps of 5), CET/CEST time zone. The end must be after the start (not even the same moment is allowed). Tickets are valid for scanning exactly between those two moments, so set a realistic end time (e.g. the end of a night programme at 4:00 the next day), otherwise the scanner will report “Event Ended”. |
| Doors open at | Optional (enabled with the Show when the doors will be open checkbox); shown to buyers and on the ticket. Cannot be after the event’s end. |
| Location | Start typing the name. If the location already exists on Eventwave, pick it from the suggestions and the address fills in automatically. For a new location there is always an Add new venue option at the bottom of the suggestions: enter the name, address, city, country (HR, SI, RS, BA) and click on the map to set the exact point (the address is completed from the map). See Locations and sales outlets. |
Step 3: Tickets and settings
Section titled “Step 3: Tickets and settings”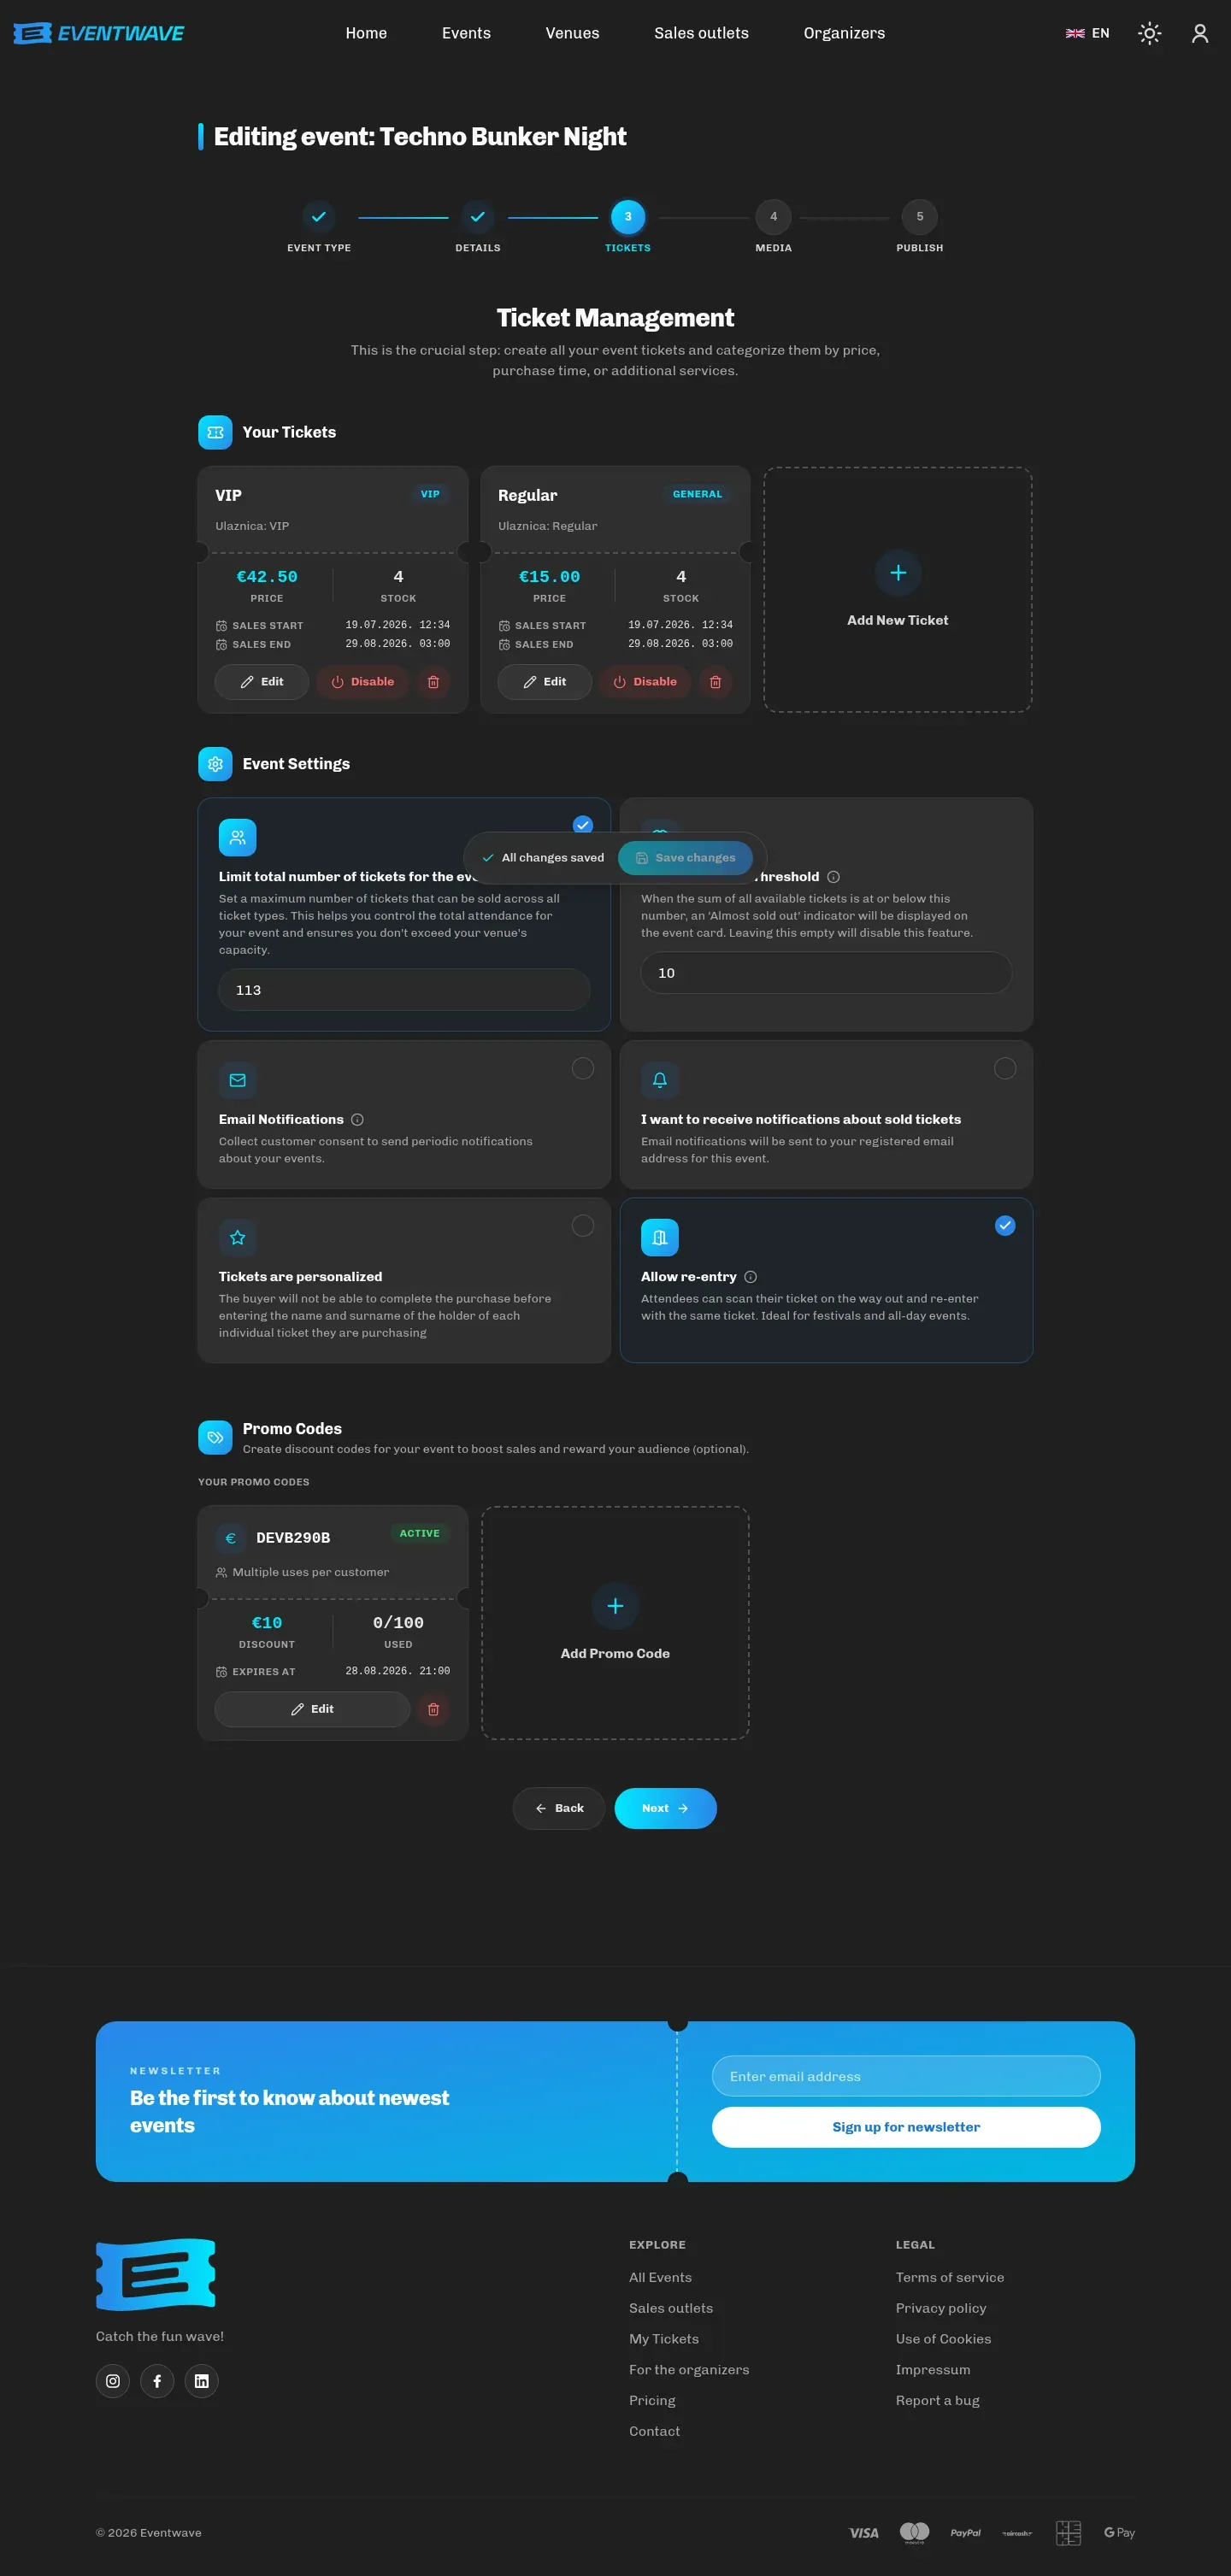
Covered in detail in Tickets and pricing. In short:
- Ticket categories (Add New Ticket): name, description, group (Basic / Early Bird / VIP / custom), price in €, number of tickets, sales period (start and end), and under Advanced Options min/max per order and an “almost sold out” threshold. At least one category must exist and be enabled.
- Event Settings: a total ticket limit, an “almost sold out” threshold for the event (required for commercial events), collecting newsletter consent, sales notifications (Every Ticket / Daily / Weekly), personalized tickets (each attendee’s name), re-entry.
- Promo Codes: see Promo codes; they can be added right away, even before publishing.
Rules the wizard checks at this step:
- a category’s sales cannot end after the event ends;
- Minimum number and Maximum number per order must be greater than 0, and the minimum must not exceed the maximum;
- a category’s Low Stock Threshold must be greater than 0 and no greater than that category’s stock;
- the event’s total ticket limit cannot be greater than the sum of the categories’ stock.
Step 4: Media, description, FAQ and contact
Section titled “Step 4: Media, description, FAQ and contact”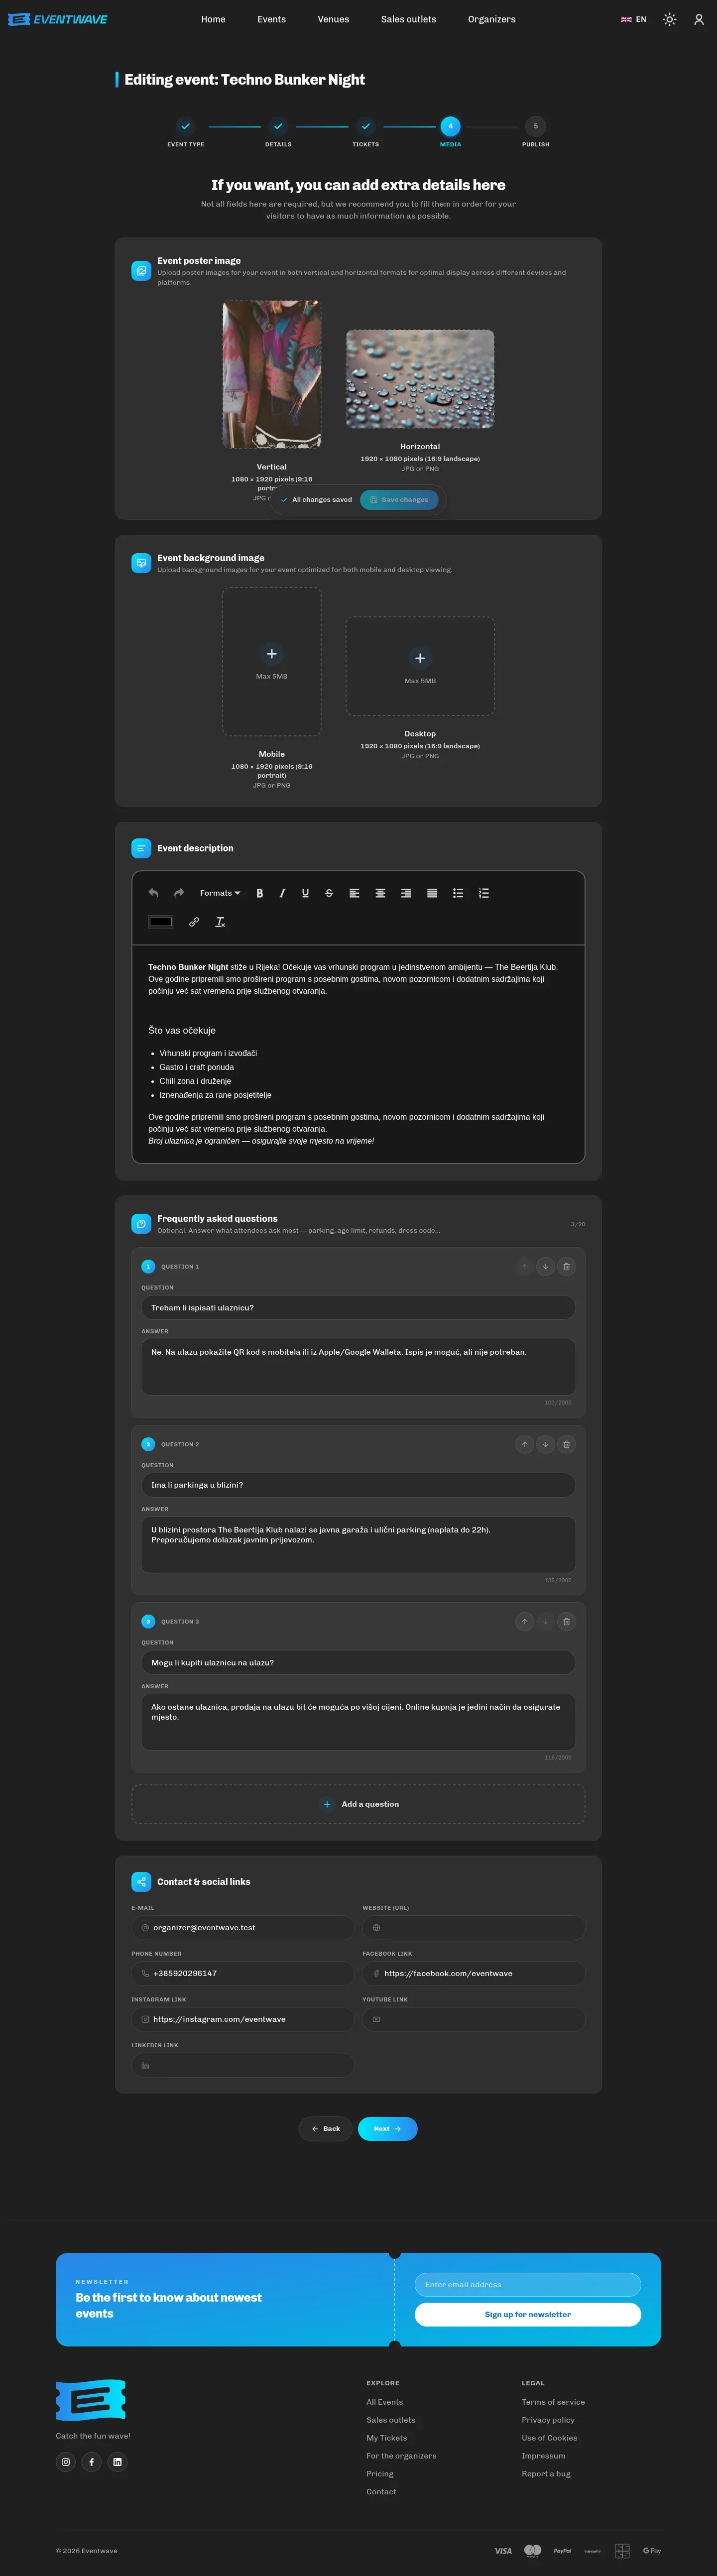
| Element | Rules |
|---|---|
| Vertical poster (required) | JPG or PNG, up to 5 MB, recommended 1080 × 1920 px (9:16). Shown on cards and on mobile. |
| Horizontal poster (required) | JPG or PNG, up to 5 MB, recommended 1920 × 1080 px (16:9). Shown in the event page header and in emails. |
| Background images (optional) | Mobile 1080 × 1920 and desktop 1920 × 1080; the event page gets a background behind the content. |
| Event description | Rich-text editor (headings, lists, links). Don’t put prices in the description: they live in the purchase block. |
| Frequently asked questions | Up to 20 questions; a question up to 200 characters, an answer up to 2000 characters, plain text (URLs become links). A half-filled row (a question without an answer or vice versa) blocks moving to the next step; a completely empty row is silently dropped. They are shown as an accordion on the event page and help in Google search. Ideal for: age limits, parking, allowed items, programme start time, accessibility. |
| Contact and social media | Email, website, phone, Facebook, Instagram, YouTube and LinkedIn are shown in the “Organizer contact” section. Social links must be real addresses on that platform (e.g. facebook.com/...). Buyers with questions about the programme reach out there. |
The Next button is disabled while an image is uploading.
Step 5: Publish
Section titled “Step 5: Publish”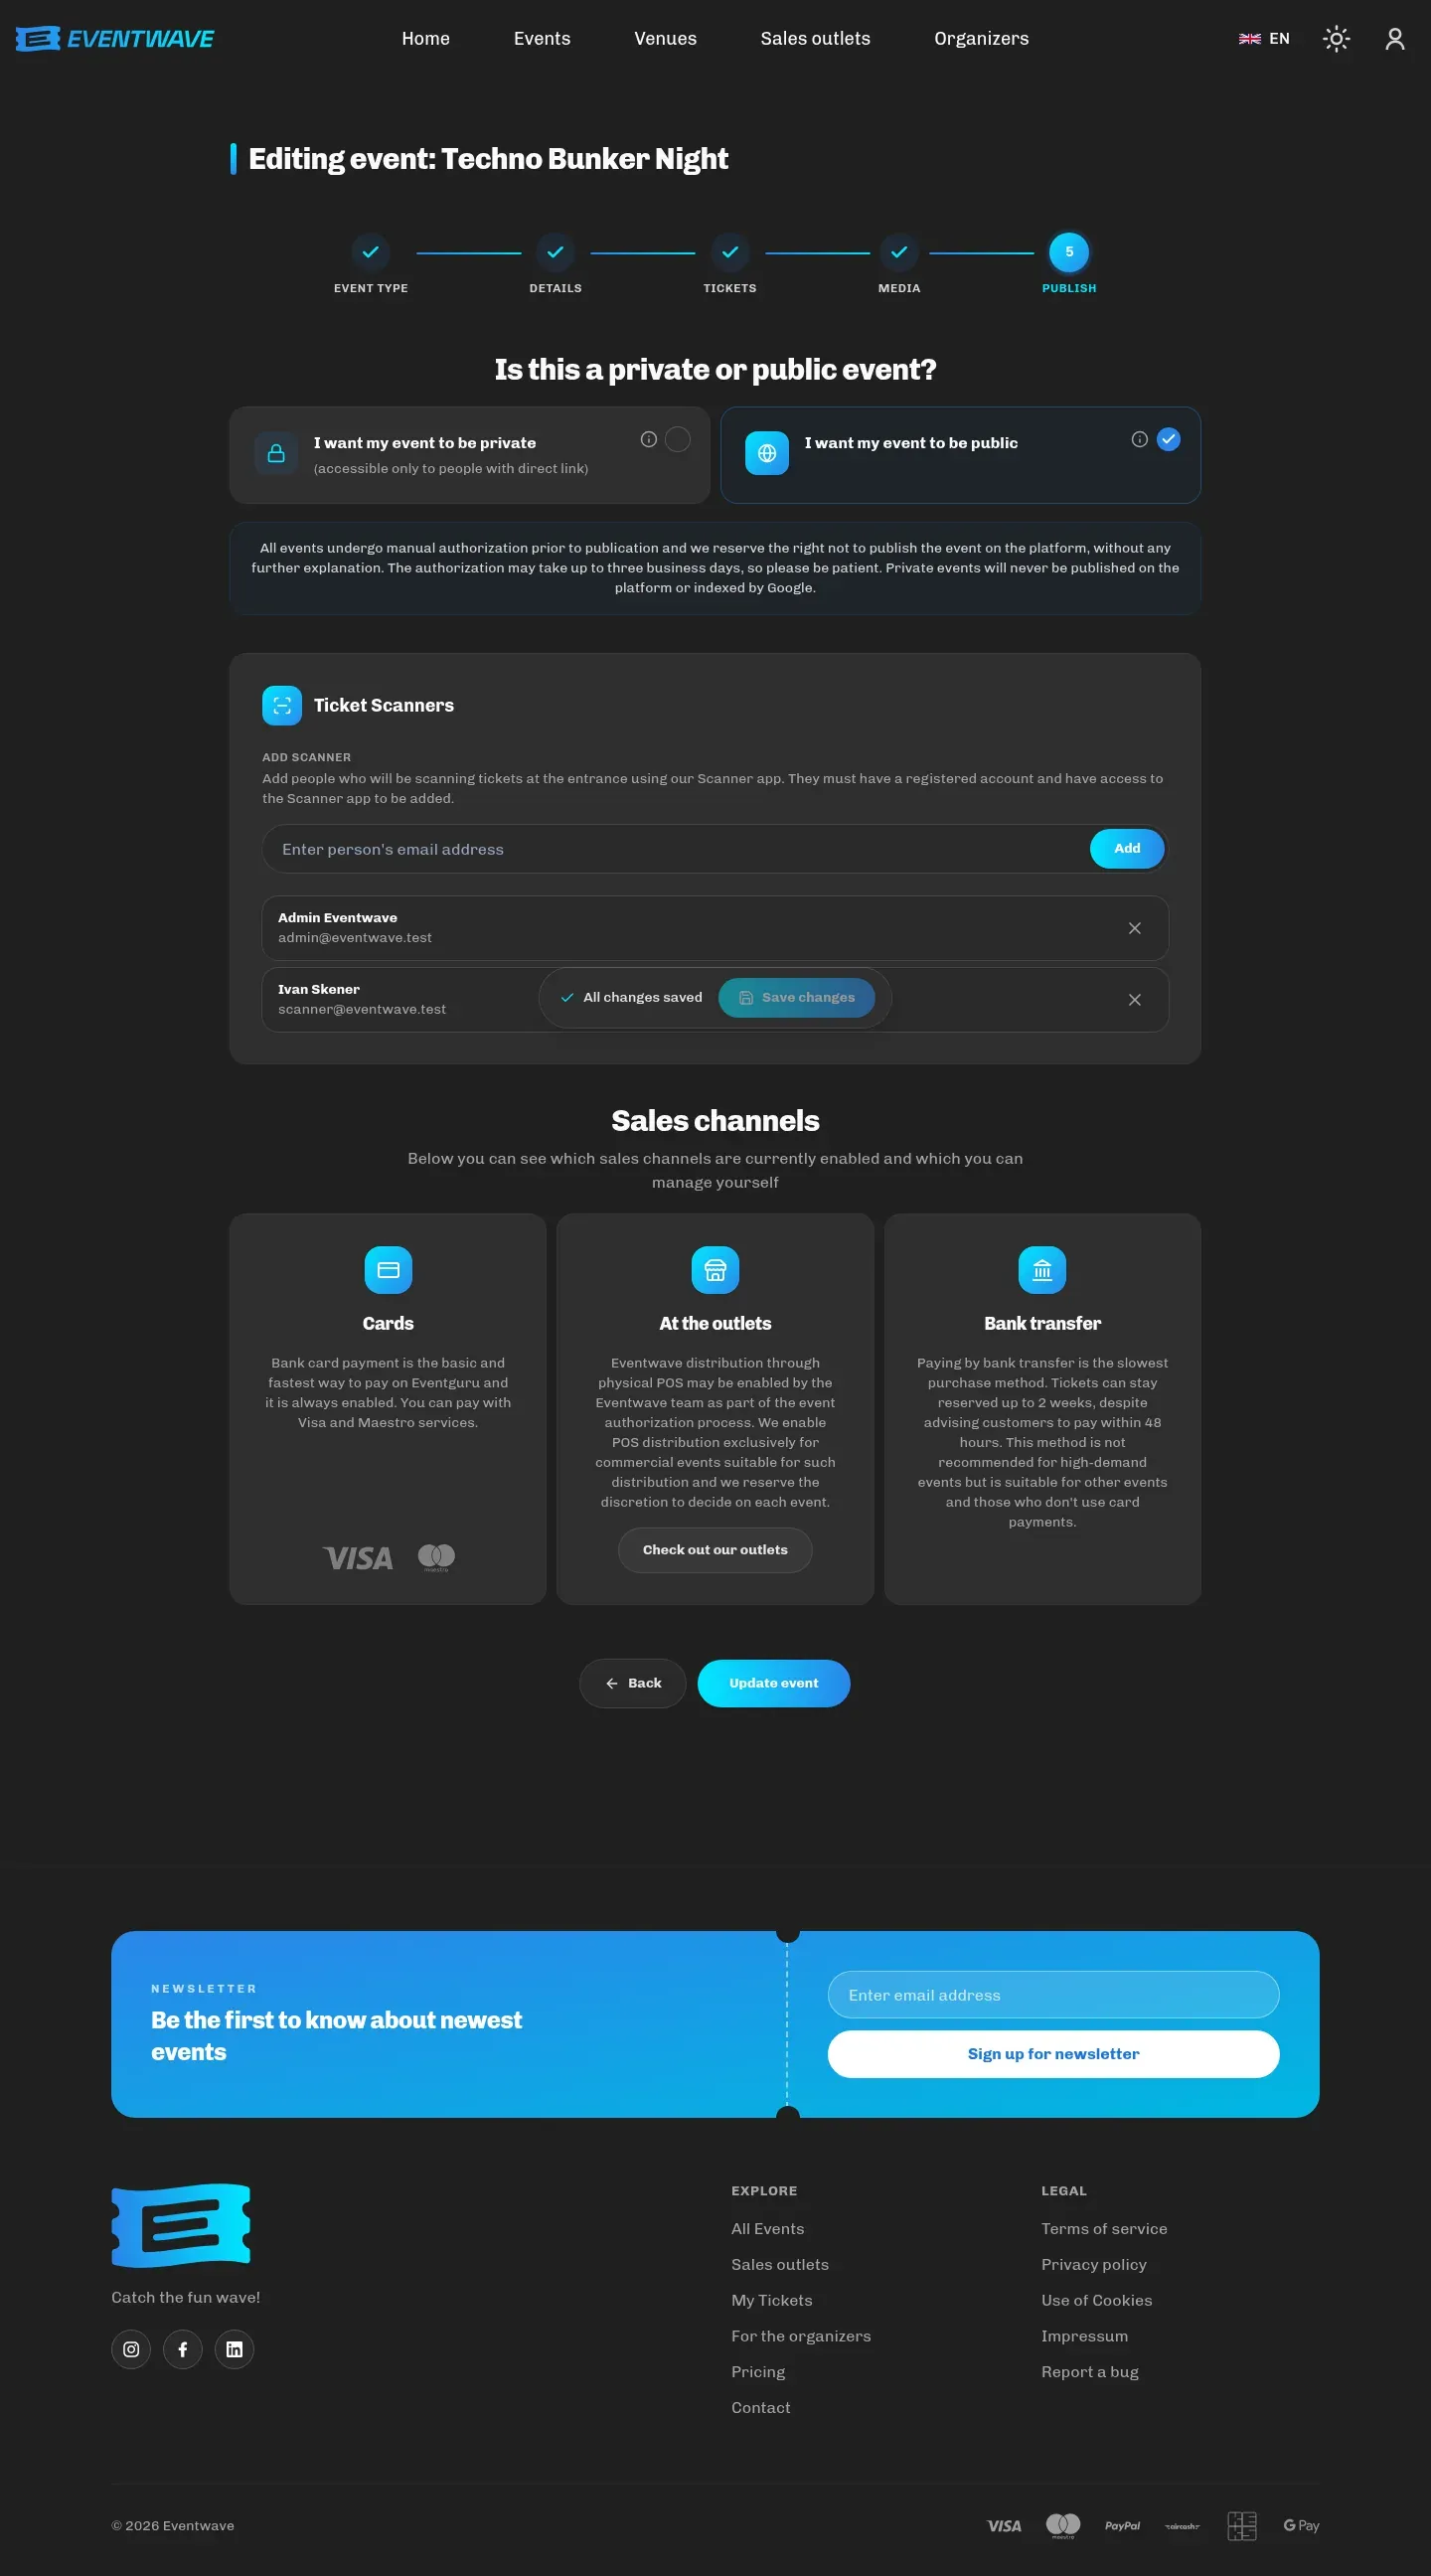
- Visibility: public (homepage, search, categories, search engines) or private (direct link only).
- Ticket Scanners: add the email addresses of the staff who will scan at the entrance; commercial events need at least one scanner. A new commercial event automatically inherits the scanners from your existing events, so the list is usually already filled in (you can edit it). The section is available to verified organizers; others see a message that scanners are set up after verification, and can create the event now and add scanners later. See Scanners and door staff.
- Sales channels (informational): cards via WSPay (always), physical sales outlets (enabled by the Eventwave team by arrangement), bank transfer (by arrangement).
- If you’re not logged in, this is where you log in/register. After logging in you stay on this step and only then click Create event.
Before publishing, the event goes through a manual review (up to three business days); Eventwave reserves the right to decline publication.
After creating
Section titled “After creating”The outcome screen shows the status: Published (with a link to the page), In review or Draft (with a Request publishing button: the request is sent immediately, with no extra confirmation). Everything else happens in My events: editing, statistics, scanners, cancelling.